Cloake board queen rearing
Queen rearing involves presenting selected larvae – whether grafted or in natural comb – to a colony in such a way that they are raised as new queens. The cell raising colony is prepared for the introduced larvae, either by rendering it temporarily or permanently queenless, or by separating the part of the hive for larval rearing from the queen (as is done in the approach popularised by Ben Harden). In addition, efforts are usually made to ensure the colony is given syrup (or that there is a good flow of nectar) and has ample pollen so the developing queens are well fed.
The Cloake board
A Cloake board is a simple way of using a single large colony to provide both a queenless cell starter and queenright cell raising colony. The Cloake board consists of a removable metal or plastic sheet in a three-sided rim that sits above a queen excluder (QE). To avoid confusion in the description below I’ll use the term ‘Cloake board’ or ‘board’ to refer to the entire thing, and the term ‘slide’ to refer to the removable sheet.
Cloake board …
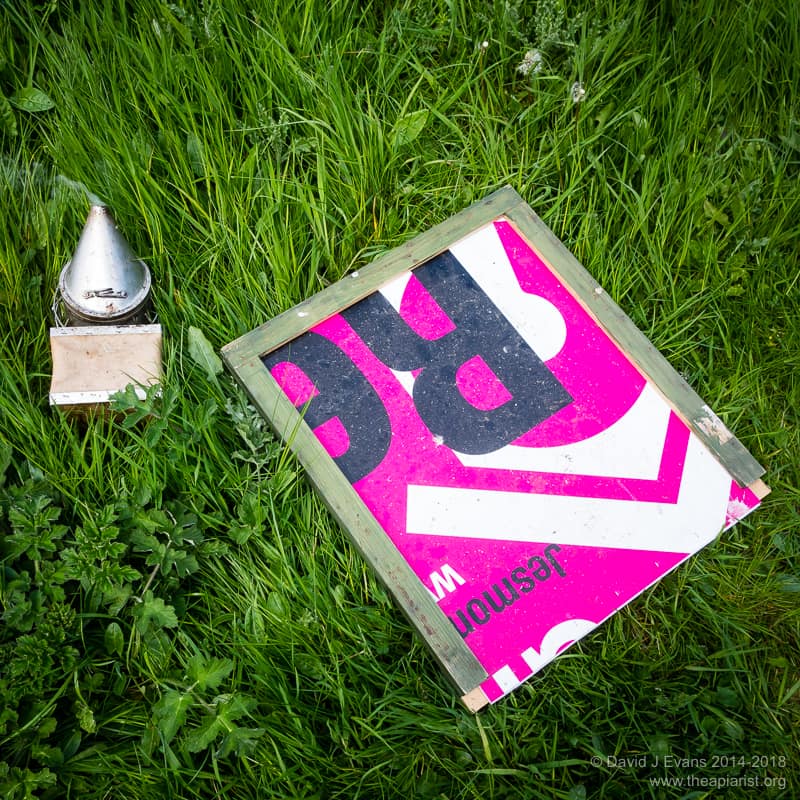
A few of the usual suppliers sell Cloake boards with integral QE’s for £35-55 … or you can bodge one together out of some scrap wood and an abandoned (honestly 😉 ) Correx ‘For Sale’ sign for an estimated £1 like I did and simply sit it on top of a spare QE (of which you presumably have several). The bees won’t notice the difference.
The board serves two purposes; it provides an upper entrance to the colony and – depending on whether the slide is in or out – it converts the portion of the colony used for cell rearing from queenless to queenright. With the slide inserted, the upper box of a double brooded colony is rendered temporarily queenless (as no queen pheromones can get to the upper part of the hive), providing ideal conditions to start new queen cells. With the slide removed, the top box acts as a queenright cell raiser and finisher, in which the queen remains trapped below the queen excluder. A couple of simple manipulations of the hive are all that is required to maximise the numbers of young bees in the upper box. The Cloake board is one of the many beekeeping items named after its inventor, in this case Harry Cloake of New Zealand.
Using a Cloake board
Using a Cloake board is very straightforward and can be divided into three basic stages – colony preparation, concentrating the bees and raising the queen cells. The queen cells can be started from grafted larvae or from eggs/larvae on natural comb – hive preparations and manipulations are essentially the same.
Colony preparation
- Rear a strong colony in a double brood box. The presence of supers isn’t a problem (see below).
- Inspect the colony and find the queen. Place her into the bottom box. Rearrange some of the frames so that there is ample open brood in the upper box. Add an empty frame feeder to the upper box if there is no nectar flow.
- Block the entrance of the bottom box and reverse it on the hive stand
- Add the QE and Cloake board with the slide removed. The Cloake board entrance should be on the opposite face of the hive to the sealed original entrance.
- Add the upper box with open brood (a second QE and supers if present), the crownboard and roof and leave the colony for at least 24 hours of good weather.
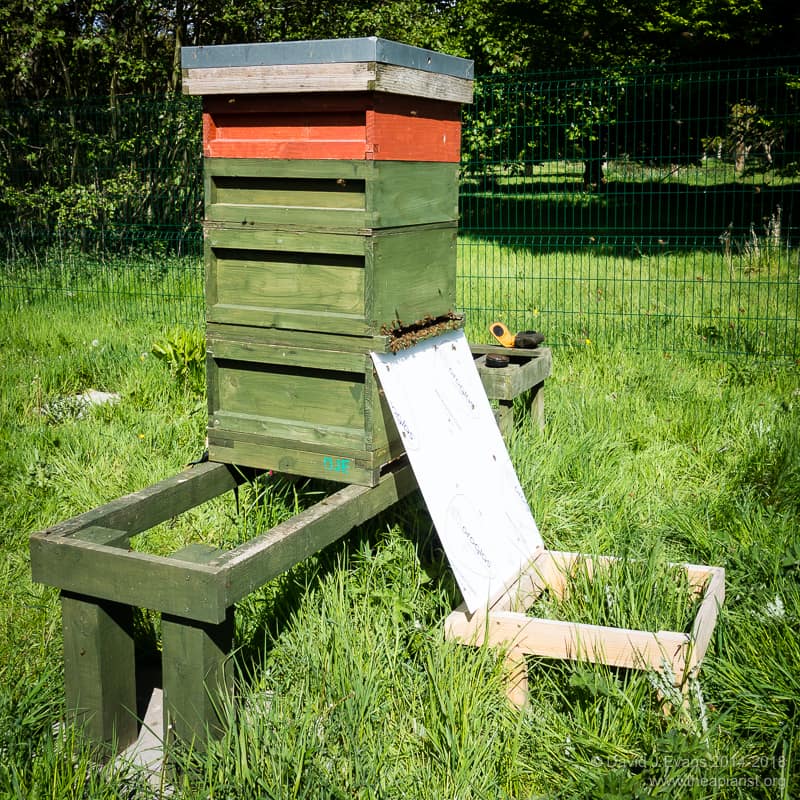
What’s happening … ? Two main events are taking place. Firstly, the bees are reorientating to the new entrance on the ‘front’ of the hive (which is a brood box height above the original entrance). You can help them find this new entrance by placing a sloping sheet of ply on the front of the hive as shown below. Secondly, lots of nurse bees are congregating on the open brood in the upper box. These are the bees that are going to raise your new queens.
Colony preparation …
Notes on colony preparation …
- You can strengthen a colony by boosting it with frames of emerging brood (pinched from other colonies in your apiary) added in the week or two before starting queen rearing.
- The sloping ply sheet really does help, particularly if you use open mesh floors under which the bees tend to cluster when they can’t find the original entrance. Give them all the help you can. This reorientation to the new entrance also really needs reasonable foraging weather. If it rains for 36 hours give them more time.
- I use frame feeders but you could substitute one of those doughnut feeders over the crownboard. Since I try and rear queens when there’s a good nectar flow I leave the supers on as long as possible and only feed when cell raising.
- It helps to mark the frames in the upper box containing very young larvae or eggs with a pen or pin. The bees might (actually, almost certainly will) start queen cells on these during the next phase and you want to quickly be able to find and remove these.
- When arranging the upper box I leave a frame of stores in the middle of the box, flanked on one side with a frame containing ample pollen and on the other side by open brood. In due course you’ll replace the middle (stores) frame with your cell bar containing grafts.
Concentrating the bees
- Gently insert the slide for the Cloake board.
- Open the lower entrance on the reverse face of the hive.
- Add 200ml or so of syrup (1:1 w/v sugar and water) to the feeder.
- If there are supers in place lift them off and replace them over a clearer board.
- Leave the colony for 24 hours.
What’s happening … ? Again, two events are occurring. Firstly, the bees are being concentrated into the upper box. Those flying from the lower entrance have already reorientated to the Cloake board entrance and will return there, becoming concentrated above the slide as they can no longer go down through the QE. Bees in the supers are joining them. The clearer board I use is very fast and efficient and the supers will be emptied in hours. Secondly, the bees in the top box are realising that they are queenless and will then readily accept the grafted larvae you will be adding.
Concentrating the bees …
Notes on concentrating the bees …
- Many of the instructions for using a Cloake board suggest either removing the frames containing eggs and young larvae, or leaving the colony for a week until there are no larvae young enough to be reared into queens. I never seem to be well enough organised, or have sufficient time, to do this. Instead, I knock back cells started on the marked frames when I add the grafts (see below), check them again as soon as my grafts have been capped and cage the cells. My approach is certainly sub-optimal, but pragmatic …
- A doughnut feeder is easier to fill but I prefer frame feeders as they’re more immediately available and in a warmer position in the colony.
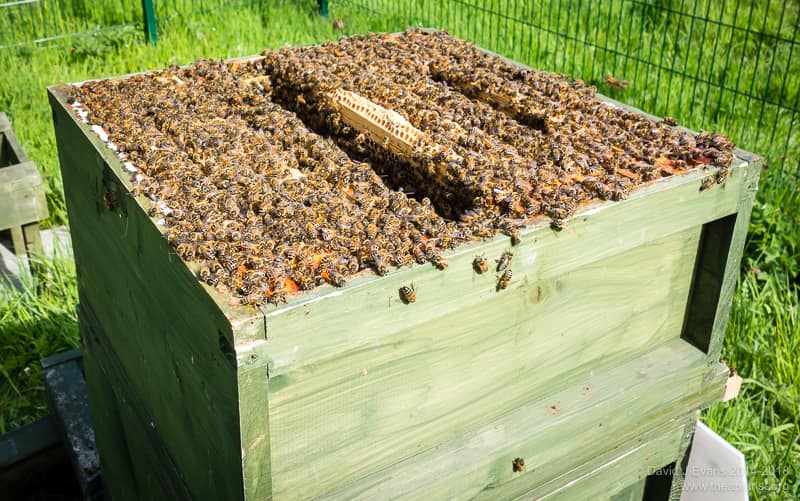
- If done properly on a strong hive the upper box will be almost bulging with bees. Removing the crownboard will result in bees overflowing and dripping down the outer walls of the hive. Care is needed to both work quickly and gently with the colony, using minimal smoke and trying to crush as few bees as possible.
Raising the queen cells
- Gently open the hive.
- Remove the central frame of stores flanked by young brood and pollen. Shake the bees back into the colony.
- Remove any queen cells started on frames in the upper box.
- Add your frame of grafts† to the central gap which, by now, will be packed with bees. Don’t force it, just let it slowly and gently slide down into the mass of bees.
- Add some more syrup to the frame feeder.
- Replace the crownboard and roof.
- Leave the colony for 24 hours only.
- Check the grafts were accepted. If not, you can graft again immediately (go back to step 4).
- Gently remove the slide from the Cloake board.
- Add some more syrup to the feeder.
- Check again 5 days after grafting. The grafted cells should now be sealed. Check the other frames in the upper box for queen cells and ensure you destroy any that have been started.
- Use the grafted cells 10 days after grafting.

Checking grafted larvae …
What’s happening … ? In the first 24 hours the bees in the upper box start the cells using the emergency response. If the grafts are accepted and the slide is removed the cell raiser will then use the supercedure response to complete the cells. This generates better fed and therefore higher quality queens. It’s important to check the other frames for unwanted queen cells. If these emerge first – perhaps because they were started from older larvae – they’ll slaughter your queens. The latter should emerge 12 days after grafting so should be distributed to colonies for mating 10 days after grafting.
Notes on raising queen cells …
- You can tell whether the grafts have been accepted by the presence of a ring of new wax around the rim of the cell cup (I’m assuming you’re using Nicot or JzBz cell cups for grafting larvae in this description). This wax rim will be about 3-4 mm deep after 24 hours. The cell bar will be heavily festooned with bees. Don’t shake or brush them off, just gently move them aside with your fingers to inspect the cell cups.
- If the larvae haven’t been accepted it’s either because they were damaged during grafting, or the colony – for whatever reason – is not suitably prepared (is the queen in the top box?). You can try grafting again.
- After 5 days the cells should be capped. They can be caged at this stage or later to prevent their destruction should a virgin queen emerge early. Remember to also check the other frames in the top box. Destroy any queen cells you find other than your grafts.
- If there’s a good flow on the bees often build brace comb between the bottom bar and the cell bar. Use a sharp knife to pare this away and add a hair roller cage to the cells … or just leave it. When you ‘harvest’ the cells for distribution to mating nucs just cut gently around the queen cells – they usually emerge perfectly well.
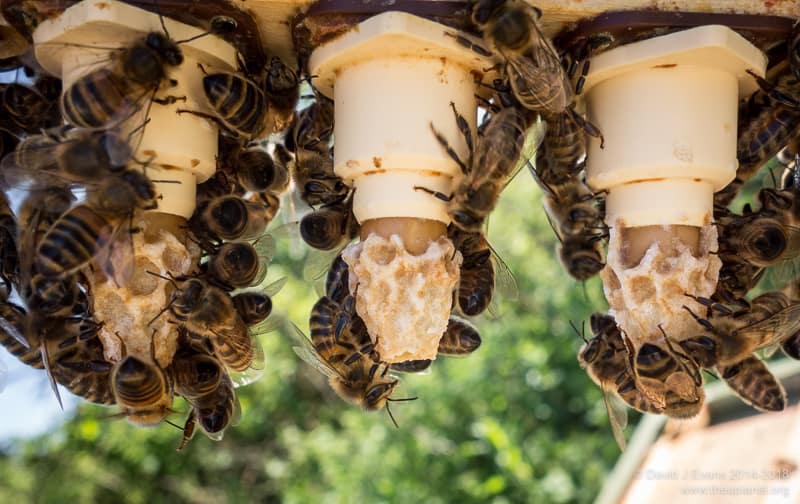
Three day old grafts
† If you don’t want to graft larvae you can simply add a frame of eggs or very young larvae in place of the cell bar frame (in stage 4 of ‘Raising the queen cells’ above). Source these from a colony with the characteristics you want in the same way as you’d select larvae for grafting. Ideally this frame should be of relatively fresh wax as it’s then easier to be re-shaped to draw out queen cells. Once these are ready they can be cut out of the frame and added to mating nucs.
Additional instructions on using a Cloake board can be found – inevitably – on the late Dave Cushman’s site and in Queen Bee: Biology, Rearing and Breeding by David Woodward.
Join the discussion ...